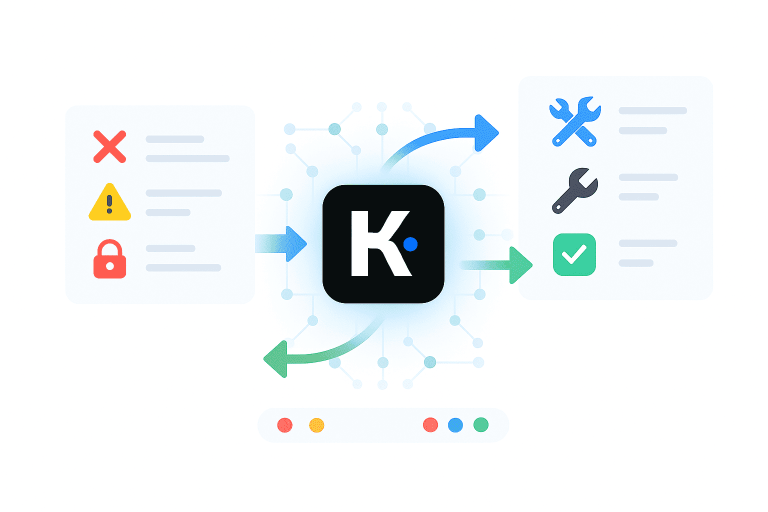
Kimi AI (notably the Kimi K2 model) is a cutting-edge language model developed by Moonshot AI. It’s a Mixture-of-Experts (MoE) model boasting 1 trillion parameters (with 32 billion active per inference) and with a long context window (128K for Kimi K2 Instruct, and up to 256K for newer K2 variants—check the Console/model card for the exact limit).
In practice, Kimi K2 excels at complex tasks like code generation, logical reasoning, and using tools, making it a strong alternative to models from OpenAI or Anthropic for certain coding and reasoning tasks.
By connecting to Kimi via API, developers can integrate these capabilities into their own applications. In this step-by-step guide, we’ll show you how to use the MoonshotAI Console to access the Kimi API, from registration to making your first API call.
Along the way, we’ll cover generating API keys, authenticating requests, and best practices (like rate limits and key security). This Kimi AI API integration tutorial is optimized for clarity – perfect for developers seeking a comprehensive MoonshotAI API guide and Kimi API tutorial.
Step 1: Register for MoonshotAI Console Access
To use the Kimi API, start by creating a developer account on the Moonshot AI platform. Visit the official MoonshotAI Console (Open Platform) and sign up or log in – you can conveniently use a Google (Gmail) account for quick access. Once logged in, navigate to your account’s billing or account overview section.
Moonshot AI may provide limited trial credits for new accounts. However, to reliably use the Kimi API, developers are required to add a balance (Tier 0 starts from a small recharge, such as $1). API rate limits and quotas apply based on the account tier.
However, you should add a payment method early on to unlock full API access: in the Console’s billing section click “Recharge” and add a credit card.
This step ensures you have enough quota beyond the free tier. After setting up billing, you’re ready to obtain your API credentials.
Step 2: Generate a Kimi API Key on the MoonshotAI Console
With your account in place, the next step is to create an API key – this key will authenticate your application’s requests to Kimi. In the MoonshotAI Console’s sidebar, find the “API Key Management” (or “API Keys”) section.
Click the option to “Create API Key.” You’ll be prompted to enter a name for the key and (optionally) assign it to a project – you can use the default project for now. Upon creation, copy the API key immediately and store it in a safe place.
(For security, the full key is typically shown only once, at creation time, so make sure to save it.) This API key is essentially your secret token for using Kimi’s API – do not share it publicly or expose it in client-side code. With an API key generated, you have the “digital passport” needed to call the Kimi AI API.
Tip: Moonshot’s platform may provide some initial free credits (for example, a small amount of usage credit) to new accounts. This means you can try out the API without immediate cost, but be mindful that heavy usage will require paid credits.
Also note that each account can create multiple API keys (e.g., one per project or environment) for better security and tracking.
Step 3: Authenticate and Prepare Your API Requests
Now that you have an API key, you need to integrate it into your application and authenticate your requests. Kimi’s API uses a simple Bearer Token authentication scheme over HTTPS. In practice, this means every API call must include an HTTP header: Authorization: Bearer YOUR_API_KEY.
When using tools like cURL or Postman, you would set the Authorization header to “Bearer {your_key}” to identify your client. In code, you’ll do something equivalent – for example, using a library or HTTP client to add the bearer token header on each request.
It’s best not to hard-code the API key in your source. Instead, store it securely and load it at runtime. One convenient approach is using an environment variable for your key (e.g. MOONSHOT_API_KEY).
Moonshot’s own guide recommends exporting the API key as an environment variable or storing it in a secure config file, rather than embedding it directly in code. For instance, on a Unix-like system you can set:
bashCopyexport MOONSHOT_API_KEY="YOUR_MOONSHOT_API_KEY"
Then your application can read this variable. In Python you might use os.getenv("MOONSHOT_API_KEY") to retrieve it.
This practice keeps the key out of your code repository and helps prevent accidental exposure. Similarly, in production environments consider using secret management tools or environment configuration for your API keys (never commit keys to version control).
Why this matters: API keys are like passwords – whoever possesses the key can make requests under your account. Proper key management protects you from unauthorized usage and potential fees.
Always keep your key secret, and consider rotating it periodically if needed (e.g., if you suspect it was compromised or just as a routine security measure).
Step 4: Making Your First API Call (Text Generation Example)
With authentication set up, you’re ready to call the Kimi API. The MoonshotAI Console’s API endpoint is designed to be compatible with OpenAI’s API structure. In other words, if you’ve used OpenAI’s GPT-3/GPT-4 API, you’ll find Kimi’s API very familiar. The base URL for Kimi’s API is:
arduinoCopyhttps://api.moonshot.ai/v1
Note: Moonshot may provide different base URLs depending on region (you’ll see both
api.moonshot.ai/v1andapi.moonshot.cn/v1in official docs). Use the one recommended in your Console/docs for your region.
All requests are made to this endpoint, similar to OpenAI’s api.openai.com/v1. For example, to create a chat completion (i.e. have the model generate a reply), the endpoint is POST /chat/completions – the same path used by OpenAI’s ChatGPT API.
This design choice means you can often use existing OpenAI API client libraries by simply pointing them to Moonshot’s endpoint and using your Kimi API key.
Let’s walk through a simple Python example using the official OpenAI Python SDK to call Kimi. First, install the OpenAI SDK (pip install openai) if you haven’t. Then use the following code snippet to send a chat completion request to Kimi:
from openai import OpenAI
import os

client = OpenAI(
    api_key=os.environ["MOONSHOT_API_KEY"],
    base_url="https://api.moonshot.ai/v1",
)

completion = client.chat.completions.create(
    model="kimi-k2-0711-preview",
    messages=[
        {"role": "system", "content": "You are Kimi, an AI assistant created by Moonshot AI."},
        {"role": "user", "content": "Explain what an LLM is to a 5-year-old."}
    ],
    temperature=0.6,
    max_tokens=256
)

print(completion.choices[0].message.content)
In this code:
- We configure the OpenAI client to use our Moonshot API key and base URL. This effectively directs the OpenAI library to talk to Moonshot’s servers using our key. (Under the hood, the library will attach the
Authorization: Bearer ...header and callhttps://api.moonshot.ai/v1/chat/completionsfor us.) - We then construct a
messageslist following the chat format: a system role message to set context, and a user question. The format and fields are identical to OpenAI’s ChatCompletion format, which Kimi supports. - In this example, we use “kimi-k2-0711-preview” as a sample Kimi K2 model identifier. Model availability and variants (such as thinking or turbo versions) are updated frequently, so developers should always refer to the official MoonshotAI Console for the latest model list and capabilities. Kimi models may support different context sizes depending on the variant, and developers should choose the model that best fits their specific use case.
- Finally, we print the assistant’s response. If everything is set up correctly, you should get a helpful answer generated by Kimi!
This simple example shows a text-generation (chat) request, but you can use the same pattern for other endpoints or tasks (for instance, if Moonshot offers a completion endpoint for non-chat tasks, etc.).
The key takeaway is that Kimi’s API works just like OpenAI’s, so you can leverage familiar patterns and libraries.
Note: The Kimi API provides access to the language model itself and does not include built-in web browsing or external content search features that may be available in consumer-facing Kimi applications.
If you prefer not to use OpenAI’s SDK, you could also use any HTTP library (requests, fetch, etc.) to POST a JSON payload. For example, in Postman or with curl you would send a POST to https://api.moonshot.ai/v1/chat/completions with a JSON body containing "model" and "messages", and your bearer token in the header.
In all cases, the request and response format remains consistent with the industry-standard OpenAI API schema.
Best Practices for Using the Kimi API
Integrating Kimi AI via API is straightforward, but to ensure a smooth development experience, keep these best practices in mind:
- Rate Limits and Quotas: During initial usage tiers, Kimi API enforces strict rate limits (such as low RPM and single concurrency) to protect the service. Under the free allocation, you may be limited to a certain number of requests per minute and single concurrent request. For example, trial users are restricted to ~1 request at a time and about 3 requests per minute. Exceeding this will result in error responses (e.g. HTTP 429 Too Many Requests). Design your application with these limits in mind – batch or queue your requests if necessary, and implement exponential backoff or retries for rate-limit errors. As you upgrade your plan or add credits, these limits may increase (the Moonshot console documentation provides details on quotas at higher tiers). Always monitor your usage via the console’s dashboard to avoid surprises.
- Error Handling: Be prepared to handle errors from the API. Common error cases include invalid API keys (HTTP 401 Unauthorized), rate limit exceeded (429 Too Many Requests), or request validation errors (400 Bad Request for malformed inputs). Check the error messages returned in the API response; they will often tell you what went wrong (e.g., “model not found” if the model name is incorrect). In our Python example above, you could wrap the call in a try/except and print out
e.responseoreto see the error. Implementing robust error handling ensures your application can gracefully inform the user or recover when something goes wrong. For instance, if you hit the rate limit, you might catch the exception, wait a few seconds, and retry the request, or adjust your request frequency. - Secure Key Management: Treat your Moonshot API key like a password. As discussed, never hardcode it in source files or expose it client-side in a web app. Use environment variables or secure storage to keep it hidden. If you publish code (e.g., on GitHub), double-check that your key isn’t in the commit history. It’s also wise to rotate keys periodically – Moonshot allows creating multiple API keys, so you can revoke a key without disrupting all applications, if needed. If a team is collaborating, consider using separate keys for each environment (development, staging, production) to compartmentalize access. Always immediately disable any key that may have been leaked to prevent misuse.
- Optimize Usage (Cost Considerations): Kimi’s API is credit-based after the free tier, so optimize your calls to control costs. Take advantage of the model’s capabilities without overusing tokens. For example, utilize the
max_tokensparameter to limit response length, and only request the level of detail you need. Monitor the token usage (if Moonshot provides usage metrics) – remember that long prompts or outputs will consume more tokens. Since Kimi K2 has a very large context window, it can handle lengthy prompts, but feeding extremely large inputs will cost more credits, so use that power judiciously. Moonshot’s pricing may be competitive (Kimi K2 is noted as one of the more affordable large models), but it’s good practice to stay within your budget by optimizing prompts and using the appropriate model variant for your task (e.g., maybe use a smaller context model if you don’t need the full 128k tokens). - Testing and Iteration: Before deploying Kimi integration into production, test it thoroughly. Use tools like Postman or command-line
curlto manually verify your API calls and responses (as shown in the quick-start, a test POST request can give you a quick feel for the API). Pay attention to the response times as well – large models like Kimi K2 can be slower to respond than smaller models. For instance, generating very complex outputs might take several seconds or more. If latency is a concern, design your application flow accordingly (perhaps perform the calls asynchronously or during non-critical paths).
By following these best practices, you’ll ensure a secure and efficient integration with Kimi AI. The Moonshot platform is continually evolving (with new features and models), so keep an eye on their official announcements and documentation for any updates on limits or recommendations.
Comparing Kimi API Integration with OpenAI and Anthropic
It’s helpful to understand how Kimi AI API integration compares to other popular AI providers:
API Compatibility: One of the key advantages of the Moonshot API is its close alignment with the OpenAI Chat Completions schema. Moonshot designed Kimi’s API to follow the same general request and response structure used by OpenAI, including the use of models, messages, and role-based prompts. For developers already familiar with OpenAI’s API, migrating to Kimi typically requires only minimal changes, such as updating the base URL to Moonshot’s endpoint and replacing the API key. The overall JSON payload structure and interaction pattern remain. largely the same. By comparison, Anthropic’s Claude API follows a different interface and request structure (primarily based on its Messages API), which means switching from an OpenAI-style integration usually requires more substantial payload and logic changes. As a result, integrating Kimi via the Moonshot API can be a straightforward process for teams with prior OpenAI experience, while other providers may require additional adaptation unless an abstraction layer or API aggregator is used.
Model Capabilities: Kimi K2 is positioned as a large-scale language model designed to handle complex reasoning and code-related tasks. One of its notable strengths is support for long-context processing, allowing it to work effectively with large documents or extended conversations in a single request, depending on the model variant. Compared to other widely used models, Kimi K2’s context capacity is designed to support longer inputs than many standard configurations, which can be particularly useful for applications involving document analysis, multi-step reasoning, or large codebases. In terms of performance, Kimi K2 has shown competitive results in coding and reasoning benchmarks, according to published evaluations. However, real-world performance can vary depending on the task, prompt design, and workload characteristics. Developers are encouraged to evaluate multiple models and configurations to determine the best fit for their specific use case.
Pricing and Usage Policies: Each provider has its own pricing model. Moonshot AI’s Kimi offers a free trial tier (as noted, some free queries or credits) and then a pay-as-you-go system. OpenAI typically provides a small free credit for new users, but after that, usage is billed per 1K tokens for each model (with GPT-4 being relatively expensive). Anthropic’s Claude API likewise has a pay-per-token scheme and may have a free trial for limited usage. One notable difference is that Moonshot’s Kimi was reported as being one of the more affordable large-model options on the market, which could make it attractive for budget-conscious projects. Always check the latest pricing: depending on model and context length, costs can add up – for example, a 128k context model will naturally cost more per request than a 8k context one. Also consider rate limiting: OpenAI has its own rate limits per minute based on account level, and Moonshot imposes limits as discussed. When integrating, ensure you comply with each platform’s terms of service and usage policies (for instance, OpenAI and Anthropic may have stricter content policies or data usage guidelines compared to others).
Ecosystem and Tools: OpenAI’s ecosystem is very rich – many SDKs, community libraries, and tutorials exist. Thanks to Kimi’s compatibility, you can leverage a lot of those same tools for Kimi (for example, using the OpenAI Python SDK or third-party frameworks that support OpenAI models, simply by reconfiguring the endpoint). Anthropic’s ecosystem is growing too, with official Claude clients and some third-party support, but it’s not as extensive as OpenAI’s. If you’re building integrations, you might find more sample code and Stack Overflow answers for OpenAI, but given Kimi’s design, those resources become applicable to Kimi as well. Moonshot AI has also open-sourced a “Kimi Cookbook” with examples in multiple languages (Java, Go, etc.), which can be helpful if you’re not using Python. In short, integrating with Kimi can be as convenient as with OpenAI, and arguably easier than integrating with a completely different API like Anthropics, due to this cross-compatibility.
Conclusion: If you’re looking to add an AI model to your application, connecting Kimi AI via the Moonshot API is a developer-friendly route. You get access to a state-of-the-art model with significant capabilities, while using familiar API patterns.
By following the steps in this guide – registering on the MoonshotAI console, obtaining your API key, and making authenticated requests – you can have Kimi AI generating text (and more) within your app in no time.
Remember to implement the best practices around rate limits and security to build a robust integration. With Kimi’s power and Moonshot’s flexible API platform, you’ll be well-equipped to build innovative applications leveraging this new AI model. Happy coding!